Category Archives: clothing

B5495 – Empire Waist Top

I can’t believe it’s been 6 months since I last posted.  I’ve been busy taking yet more sewing at FIT – made some velour pants and a blazer/women’s suit jacket in Sewing II but, while they both came out well, nothing really to write home about.  Now, I’m in the midst of the first course of their Haute Couture certificate: Haute Couture Sewing Techniques (will post about that soon).

IOW, I’ve been sewing a lot of stuff NOT for me.  I decided to right that wrong by finishing a Butterick top I started 4 years ago when I didn’t really know much about sewing at all.  I came across it looking for some materials for my current class.  It was 80% done when I stopped work on it – presumably b/c I got distracted by a different, shinier project.  I really need to stop doing that.

In any event, it came out great.. with many caveats.

img_1479

Pros:

  • It’s done. I’m very bad about finishing stuff so this is good all on its own.
  • I really like the fabric still.
  • Despite having gained weight since I started it, it fits well enough – thankfully.
  • It’s the same length – front and back.  Having large breasts, often RTW shirts ride short in front.  Since I made this myself, I set up the hem to be even all the way around using my lovely assistant, Duct Tape Alex, to get it right.
  • It’s long enough.  I am longer-torsoed.  That plus my breasts, often tops are too short overall for me.  I made this one to my own hip length.  Even in lower rise pants, my belly will not show. Sweet.

Cons:

  • This is/was my first knit project and I really didn’t know what I was doing and if you look closely, you can tell.  Oh well, got to start somewhere, right?
  • I had no idea about pattern matching back in 2012.  Had I started this now, it would have attempted to fussily match it to a couture level.  But I made the entire front before I stopped sewing it and there is some weird pattern matching on it (or lack thereof).  Oh well.  This weekend, I made the back so I was able to match the CB pieces so they form a straight line but that was the best I could do without recutting them.  I can live with this but next time, they will match!
  • There is some weird sewing going on on this thing and to be honest, some of it was done as recently as Saturday afternoon.  You can’t see it so I left it but no points for me on sewing.  Bad Alex!

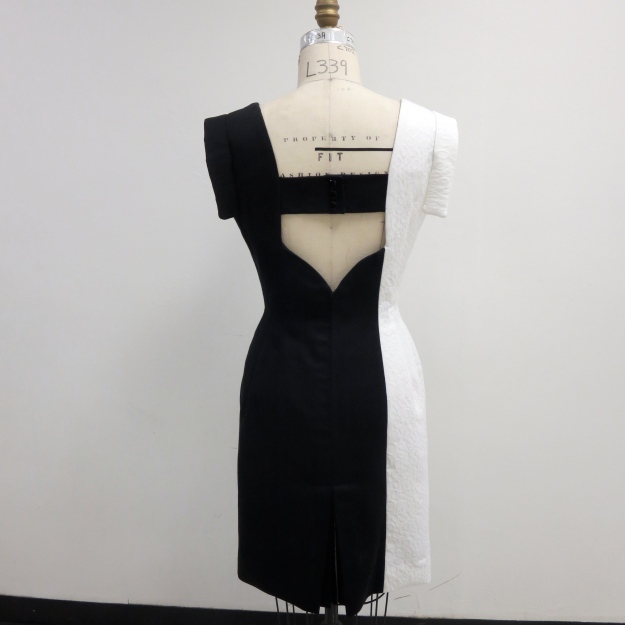
Back – can you see the CB join/pattern match?  Sort of, but not bad.

img_1481

What I learned on this project.  A lot:

  • How to basically use my serger.
  • Sort of learned how much to stretch while sewing on regular machine with a knit.  Will have to continue to work on this.
  • That certain ‘haute couture’ techniques, while fussy, are a total save.  I thread traced the hem line which was helpful since it sometimes wasn’t level with the patterned fabric.  I also basted the side seams before sewing which allowed me to take in some extra fabric around the armhole making it much less blousey, AND, adjust overall the seam allowance in that area to get a better fit.  Third, I did some blind stitching and you really can’t see it – all those hours of practicing tiny stitching in Haute Couture class are paying off!
  • My Brother NX450 does not love sewing knits.  Could be me (probably) but I’m hopeful my next top will be more serger heavy as I still want to get to know it better.

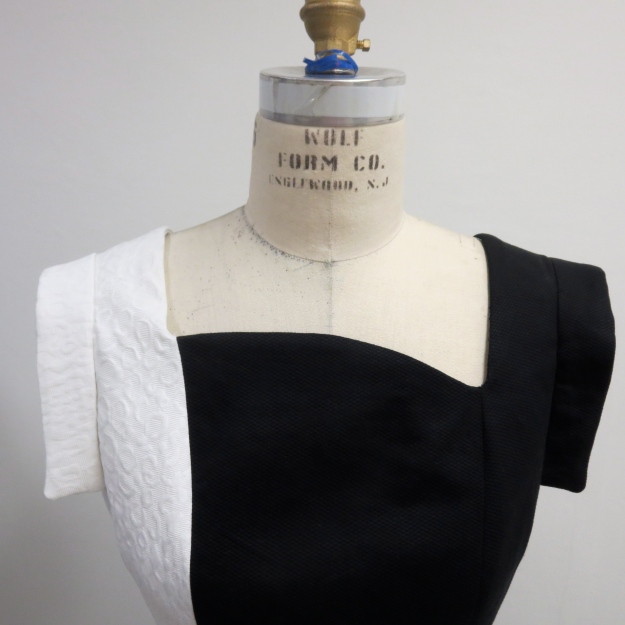
Blind stitching at neckline.  Hard to find – go me.

img_1488

That’s it for now.  Next up will be another knit top, this time from Bootstrap, but I have a lot of FIT homework to finish first.  More posting, hopefully, sooner than 6 months 🙂

img_1498


THE DRESS – FIT Draping 1 Final Project

For our final project we were to drape a princess seam dress with a collar or interesting neckline and sleeve and then transfer the design to paper and then sew it up and present it at our last class (tonight!).   We were told a color story (white/black/grey/red) and then got to collectively choose a theme “Alice in Wonderland.”  My dress is the Knave of Hearts – a black and white princess line with a back cut out that suggests a heart.  Behold!

IMG_0439IMG_0440
IMG_0443

I love this neckline!  It was a bear to execute and line up the facings for it though.  I did multiple versions of the facings and they are two color to match when folded under – really can’t express what a pain in the ass they were.  Tons of clipping, pressing, more pressing, even more pressing was the only way to get them to lie flat.  Close ups!

IMG_0442IMG_0441
IMG_0447IMG_0444

The back has a hand-picked zipper and honestly I can’t imagine why you would ever do any other kind.  So easy.  I hate putting in zippers – I haven’t quite mastered the spacing around the tab area and even messed it up with the handpicked.  The difference with handpicked is it was super easy to fix and get it to a level I liked it.

The black fabric as you can see above was a lint magnet.  This is AFTER I went over it several times with a lint roller.  Oh well.  I love the white fabric.  It feels completely luscious to the touch but is a bit on the thick side and was only with the FIT ironing set up that I could get things to iron down at all.

IMG_0453
IMG_0451

The sleeve turned out to be a bit complex to pull off.  It is set in but only across the upper half of the shoulder and then moves off to the main garment.  I finished the open part with a bias facing.  The white one is a little squirrelly (dropped my ‘execution’ grade to an A – bah!) but you can see what’s going on a little better here.

I learned a ridiculous amount in this class.  I can’t believe I designed this dress and then I can’t believe I sewed it up.  I’ve never made anything this complex and learned a lot from ‘what not to do’ and ripping things out.  Still, I’m very pleased with how it turned out.

Here are a few bonus action shots – the drape and the pattern I traced off, and the like.

So much work. We spent a month of this and I spent probably – no kidding – 80 hours on this project. I really didn’t think I had it in me. Apparently I did! So fun.

The ‘Term Garment’ Sketches

My friend John pointed out I never posted all of my sketches.  So here they are.

There are two sets  of sketches.  The first set was deemed too ‘ready to wear’.  Here are those.  I actually LOVE these dresses and want to wear them.  Maybe I”ll make these for me.

IMG_0345IMG_0343IMG_0341IMG_0339

She gave me a day to redo them (yikes, not a lot of time).  Also, she also made us (as a class) pick a theme and colors and we went with Alice in Wonderland with a color ‘story’ of Red/Black/White/Grey.   Here are my more thematic drawings.

IMG_0356
This above is the one I’m making. It’s 1/3 white and the rest is black. I’m also going to add a double box pleat at the back as a kick pleat. Very cool.  Here are a few others.
IMG_0354IMG_0352IMG_0350IMG_0349

Hope you enjoyed!

FIT Draping – Dress 5 a/k/a We Can’t All Be Winners

Poor little Dress 5.  So close and yet so far.

We proceeded with our training to a Princess Seam Dress.  I based my design on my Term Garment (next project) for which I’d submitted and gotten approved a flat sketch weeks ago. Here is a photo of the Term Garment sketch:

IMG_0355

We were allowed to use our term garment as a basis for Dress 5, but Dress 5 also had to include a collar and flares/godets/pleats (at least one type) in our design.  My term garment design absolutely does not want a collar so I decided to do the whole ‘go big or go home’ and it was, indeed big.

IMG_0416 IMG_0417This is a Bias Curled collar (which one student labeled Cinnabon because that’s what it looks like before you cut it – a giant snail shape)  which… maybe works? but I personally HATE IT.  Since the neckline of the term garment is so cool and I’d draped it well, it killed me to hide it under this monstrosity.  I told friends that it reminded me of a scene early on in True Lies where Jamie Lee Curtis is shown in a very fuddy dress with a huge collar and ruffle at the bottom which she ends up ripping off and ending up in a great dress.  That’s me here.  Rip that Cinnabon collar off and you have a great neckline.  With the collar – meh, oh well.

The whole thing is compounded by my totally failed bell sleeve.  Points off for that one.  It was too late to fix – so ugly.

I kind of like the collar in the back but still meh.  Works better without a collar.

IMG_0412

Overall, collar and sleeve aside, I had a horrible time fitting with this dress.  She actually didn’t reduce me for that which I was amazed b/c the fit is so dumpy and I couldn’t figure out where I went wrong with it. Should I have added additional side darts?  But my approved drawing didn’t HAVE darts and the professor is an Eagle Eye for stuff like that.  If something’s missing, she will immediately notice it.  And fitting for a close but breathable (enough ease) fit is still not something I can see easily  In any event, she said I merely needed to adjust the side seam, taking it in from waistline up to armpit and then letting it out from waistline down to hipline and I tried that and the fit was instantly almost perfect.  Amazing.

Shot of the back:

IMG_0411


Yes, this design gets merely a participation award.  Also, I’ve fitted this thing so many times, it’s stretched out beyond usability, so I’m having to redrape the term garment from scratch starting tonight.  Still, doing something a second time takes about 1/3 of the time and it’ll be really nice to have a cleaner garment.  Wish me luck.

FIT Draping – Dress 4

I’ve been remiss in posting.  Here are some shots of Dress 4 – the Shift/Sheath dress, with bias collar and puff sleeve (I made what’s called a trumpet sleeve – puff on bottom):

IMG_0383

With a lower neckline in front and back, I didn’t need a full on dart so I spread the extra fabric in front into two little dart tucks.  When this dress is pressed (which I did do before I turned it in), the dart tucks look really cute. A fun element to try later.  (Back neckline was low enough I didn’t need an above-shoulder line dart at all.)

IMG_0384

In the end, the collar would not end at CF but extend around across the left side of the dress (right side to you) to join the other tie end to create one piece.  It ends in the back with a knot tie that goes halfway down the back.  If I were making this again, I’d make the tie extend to about 6″ before the hem. This was lazyness – I cut too short and didn’t feel like fixing.  Too burnt out from dress 3.  🙂

IMG_0388

Above you can see the tie part of the collar.  She asked that our Sheath dresses be not too fitted – they should be comfortable. She liked this fit but for me, if I were making this FOR me, I’d likely make it a little closer fitting and use a stretch cotton but I tend to like things more fitted.  The hem length here is mid-thigh for a kind of mod mini-dress look.

IMG_0385

Sleeves are designed on paper and not draped – at least set in sleeves that we’ve done aren’t.  So sleeves feel very experimental to me – I followed instructions and this is what I got.  I’ll have to do a bunch more to really figure out how to translate my mind into the sleeve.  My real intention was a fitted to just below elbow more bell-like sleeve but instead I ended up with trumpet.  I actually like it the trumpet lot but if/when I make again, I’m going to do a bell sleeve as a draft and see how it looks.

IMG_0389

A more front view of the sleeve.

I modeled this dress on two drawings I submitted to be considered for my term garment project (coming up).  She rejected them as too ‘ready to wear’ but I thought the ideas worked well in the Sheath and thus, I went with it.  I ultimately got an A (as opposed to an A+) due to the simpleness but I like it which is kind of all that matters, so okay.

Mod-Mini Princess Line with 1″ collar.  You can see the sleeve is a bit different here.

IMG_0339

The back of another princess line showing the tie idea.  I like the length of my drawn tie better.

IMG_0354

Thanks for reading.  Dress 5 coming up, plus a QUILT!

FIT Draping I – Dress 3

IMG_0359

For this one, we had to design the neckline, shoulder yoke and midriff yoke, we had to use pleats or gathers in our design in both the front AND back bodice portion, design a cap sleeve and incorporate a flare skirt.  I’m really pleased with how this came out, but wow, this dress was a pain in the ass.

IMG_0360

I got the idea for this design from a 40s style dress on the web so the genesis shape of front shoulder yoke and midriff yoke was styled from that.  The pleats on the web dress went straight across; I LOVE/prefer the way mine went, with the split around the ‘apex’.  The collar was not required for this project and is a little hard to discern from this photo due to the way it’s pinned on but it basically is a stand collar behind the neck curving around to flat against the sternum and fading to zero at the join with the midriff yoke.

IMG_0362You can see the back of collar here.  The back is entirely my own creation and in a perfect world I would not have pleats in it at all or something a little cleaner looking.  Still, I was pretty burnt out by the front at this point – It was tricky to get it to lay flat and not poof around the breast AND ugh, there just ended up to be myriad problems with this dress.

To wit – due to the ease in the back and yet the fitted front, I could NOT get the side seam to line up.   Hours lost there. I have no photos but there are probably 6 versions of a bodice side seam guidelines under the arm.  I finally pinned it by eye as it was the only way to make it balance.  Even with that, I still feel the fit in the is not optimal.  Yes, I want some room so you can move but it looks bunchy to me especially under the arm

I did the sleeve quickly and I’m not mad about the shape.  This was our first designed sleeve so I just made ‘something’ but in a future garment, I’d make either a short cap sleeve or do something non-cap that goes down the arm. But it fulfilled the assignment so bygones.

IMG_0363

Having an empire waist (my choice) made the hem a bit tricky and annoyingly, my flare skirt which looked fine when I draped it got wonked out when I pressed it. You can see it doesn’t quite hang right here.  Thankfully for grading (these photos were taken on a prior day), I took her advice and steamed (shrank) the fabric again and it suddenly hung beautifully.  Should have gotten a photo.  Total save.

I was pretty shocked I got an A+ on this one, mainly due to the side seam wonk.  But ultimately she loved the front as much as I did.  I think it’s really stellar.  I’m not sure this style would look good on me as I already have a large chest but I could definitely see taking the front of this design, redrafting the back a bit, and making a nice empire waist top for myself.  Also making a flare skirt to wear independently  I really got a lot out of this dress but wow, it was tough.  She said herself, that aside from the princess dress, this was our hardest assignment.  Other students made AMAZING things but some aren’t even done yet.  It’s that tricky.

Next up – a Shift Dress that we’re turning into a Sheath dress.  I’m doing the Shift this weekend, I’ll try to remember to take pre-sheath photos.  This dress will end up with a bias collar (which she demoed last night and was hella cool) and a puffed sleeve – mine is a long bell sleeve.  Can’t wait.

Draping at FIT: Dress 2

For this one, we did another traditional bodice, this time with a bust dart instead of shoulder dart and, on the back, a neckline dart instead of a shoulder dart.  We made a non-roll collar (although honestly it seems almost the same), used a hip yoke, made facings for each of those as well as neckline facings and draped a gathered dirndl skirt.  (Collar below was the revised collar – I thought it suited the dress better.)

IMG_0309 IMG_0310
IMG_0306
IMG_0312 IMG_0313 IMG_0315

Line drawing:

IMG_0317

I had planned to blog this class more but wow, it is a total time and energy suck.  Not complaining but on top of my full time job and the 6 hours of class, I’m spending at least 10 hours (often closer to 18) each week on draping so by the time I get home, I’m pretty much good for nada.   I am learning a ton, though, which is cool.  But wow, so tiring.

More soon.  Onto dress 3!  Yikes – have to figure that out!

FIT Draping – Dress 1 complete

I’m pretty happy with it, mostly with the fit.  The color is me-designed and is pretty boring but at 12:30a last night I was in love with it.  So I may go down to school on Saturday and drape a new, less-nun-like collar.  But this one does the job enough.  Love the way the skirt fits.

IMG_0270

Collar close up.  Wow, it looks really big. I may make this smaller:

IMG_0275

Back of collar:

IMG_0272

Side-ish view:

IMG_0274

I fixed the front fit issues by taking in the side seam at the waist, grading to the line I was at at the under arm side seam.  It fits much better now.  I also adjusted the sleeve pins after I looked at the textbook and realized mine were incorrect.  Pinning seems to be very important to these teachers and thus… it was worth fixing.

At this point though, I’m not completely done.  I hadn’t realized that we were required to produce a technical drawing (I think, as opposed to a fashion illustration) and the swatch we’d make it in so I’m back to FIT today, this time to the library to get a book on how to do that.  My dreams of a light weekend are dashed – I’ll be working on drawing this thing.  But it’s exciting to see how much we’ve learned in only 4 classes.  Next week we start draping dress #2.  Onward.

FIT Draping I – classes 1-3

It feels like a year since I’ve updated much less read my blog feed. On August 31, I started back at FIT, this semester taking Draping I. For those of you who don’t know me, I am a professional musician part time and a paralegal the rest of the time and my sewing skills generally run to quilts. But I’ve hated how all my hand sewn clothing turned out. Plus I have never loved my performance clothing. Plus I’ve never liked my personal clothing. And my body isn’t an actual perfect size anything. And wouldn’t it be nice to have clothing of my own choosing that fit?

Enter FIT. You can take up to 24 credits there as a non-student so over the summer I took Sewing I and learned a ton. This semester is Draping and it is probably the most time intense class I’ve ever taken in my life. I am putting in hours per class per week. So far we have had 3 three-hour class sessions and I have spent at least 30 hours on homework. I’m tired.

I spent 7 hours yesterday and 2.5 today down at the school (thank you, state college that cancels class for religious holidays!) and caught up with the classwork up to this point. Bodice sloper front, bodice sloper back and set in sleeve (which shape we did not drape; rather used an industry pattern piece for our dress forms which we then had to set in).

Voila:
IMG_0260

IMG_0261

So there are a few fit issues.  I need to re-pin the front as it’s not hanging straight but I think it actually DOES (just repined to form badly).  One of the darts is pinned in the wrong direction.  There may be too much ease (or not enough) in the back.  Still, overall I’m very pleased with how this came out.  I had to make 12 fronts over the past 3 weeks to get this one front mostly right.  While I’ve gotten faster, each front is taking at least 75 minutes to do so you do the math.  The guy in the back is a very nice sewing teacher ‘assistant’ who passed by – he teaches a couple of the draping students in sewing class and stopped to say hi to them and then hung out giving us pointers, pointing out errors, etc.  Seriously, this would have taken another 6 hours and would not have looked so good.

Our professor says at some point in the semester this will all just ‘click in’.  We’ll ‘get draping’ and it will become fun.  At this point, I’m still not great at analyzing fit issues and adding sewing ease (the bane of my existence) but I’m sure that it’s in me to learn this skill.  For now, though, I’m at home and it’s still light outside.  I have been feeling like a vampire, getting home so late each night.  I’m off to watch TV or read a book or do anything that doesn’t involve draping.  Tomorrow, we drape a pencil skirt and rolled collar for this (the collar we have to create a ‘design element’ for – I have no idea what I want to do so I am estimating living at FIT this weekend) and polish it up for grading next Monday.   Then we are onto the next drape.  All told we will drape 5 different types of sample dresses like above and then we finish the semester with a princess seam-based self-designed dress.  If nothing else, I’ll be trying many things I’ve never done before in this class so that’s cool.  For now, I’m officially taking the night off!

If you celebrate High Holidays, Shana Tova.  Be well, friends.

FIT Shirt is done!

Behold. For buttons, I used these sweet white pearlescent ones $1 for 7 at Dakota – nice.   I got the buttonholes done at Jonathan Embroidery – what a treat.  $3.50 for all $7 and done in 20 minutes.  I was going to make them myself but due to time constraints… let’s just say that their service is a total mental ‘spa treatment’ when you’re in a rush – fast, cheap and they look gorgeous. Done.
IMG_0090Close up:

IMG_0094

Spent tonight’s class putting in a hem (see above).  Mucho basting and it only came out okay but she was pleased with my work.  I got an A on this project, an A on the skirt and As on both my homework assignments so I’m pretty sure I’m getting an A in the class (she also evaluates work as we go so who knows).   More importantly I learned a TON.  I am really impressed that I made such good looking garments.  I learned a ton of techniques – I’m very psyched to put them to work in my own projects now.

A shot of the back:

IMG_0092

Now, I’m off on vacation.  See you all on the other side.