Author Archives: Alexandra

About Alexandra

I am a professional singer and guitarist living in NYC who loves expressing herself through visual crafts. You can also find me at Ravelry and Pattern Review - screenname "Alexigente".

Don Carlos Quilt!

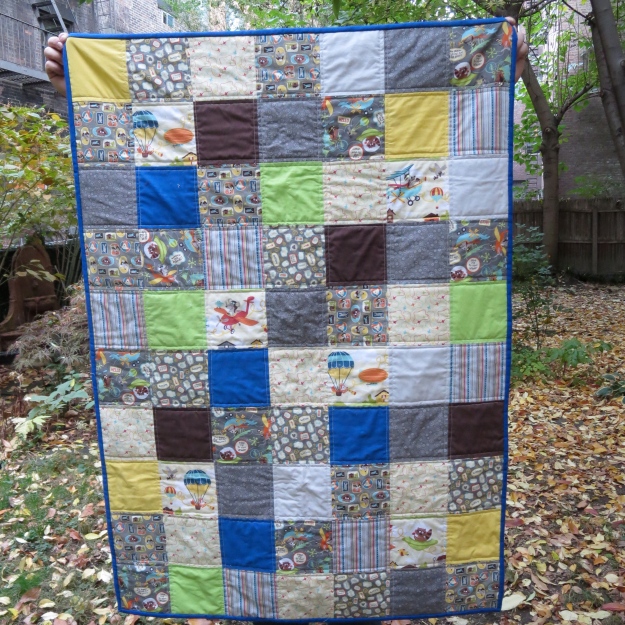
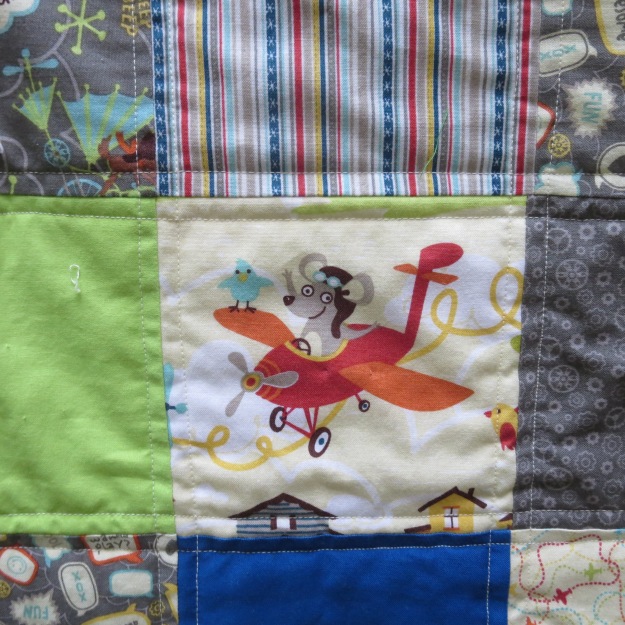
When my friend Ranta told me she was going to have a baby, I was very excited to make her a handmade baby quilt. One of the reasons I like making baby quilts, aside from (a) the size (not too tough) and (b) a personalized special gift, is it is really fun to pick out baby fabric–there is so much good stuff available these days. I located the perfect fabric for her in Riley Blake’s Little Flyer collection. I went with the Gray color way and ordered a fat quarter set of all 7. Coupling that with solids and a few other prints I already had on hand, over the summer I pieced together the quilt front and back while down the Shore (using the Airflyte). IMG_0210
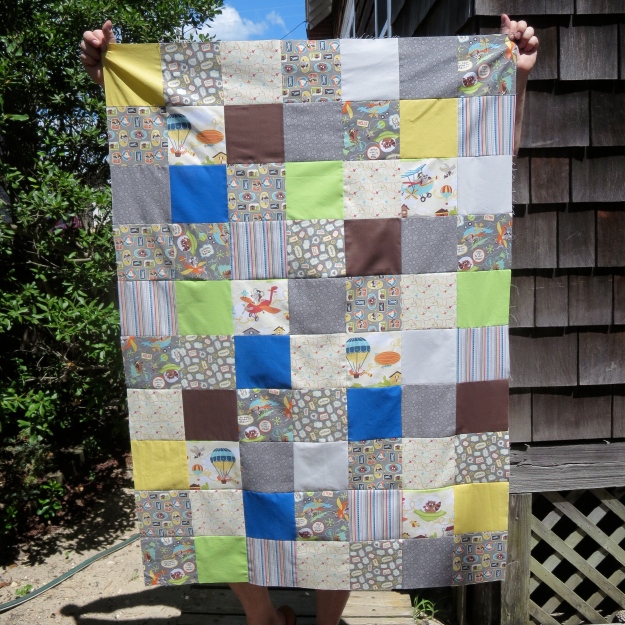
Here’s the front. Ah summer!

Just when I was about to start quilting this quilt in August, my Brother decided to break. You all know that saga, but the upshot is that by the time I got my machine back from repair the second time, I had started taking draping class at FIT and had literally no time or energy to finish it. Last weekend, with Ranta two weeks overdue, I realized it was now or never if I were to deliver it to her when I first met the little guy. So I buckled down and did a sweet simple quilting and got it done. I’m really happy with how it turned out.

Front:

IMG_0398

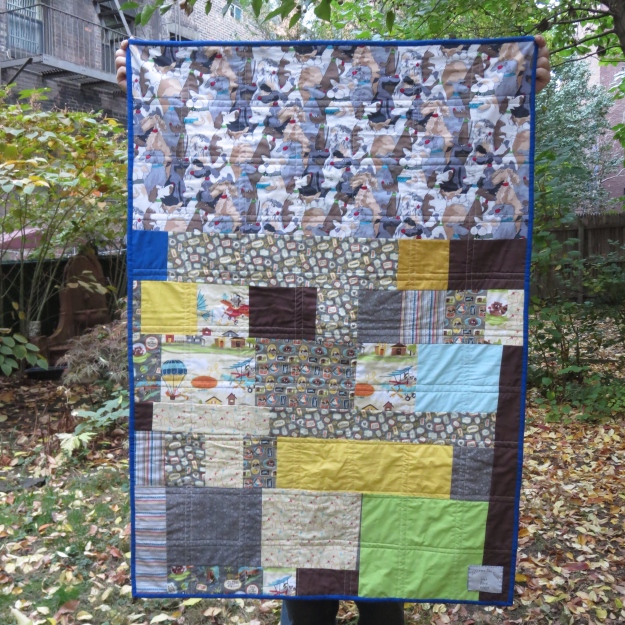
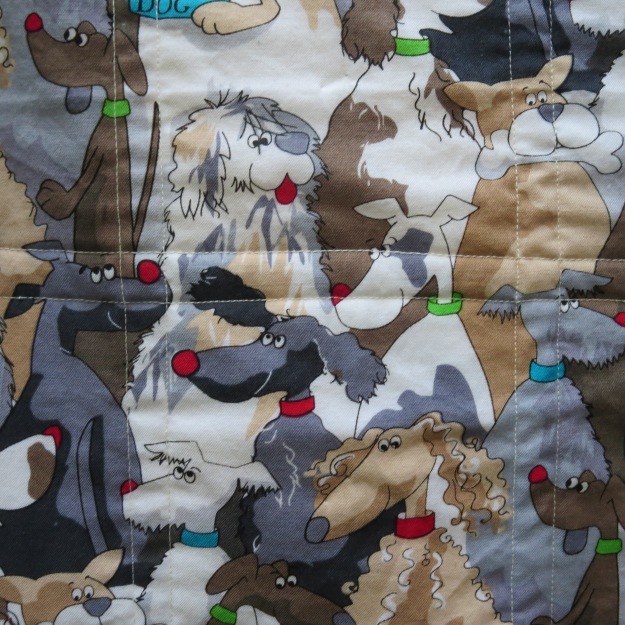
Back.  Leftovers plus this great big piece of dog fabric.  Ranta and Ross may have a cat but I know they have a soft spot for dogs. Might as well indoctrinate little Don Carlos to dogs early on.

IMG_0393

IMG_0394

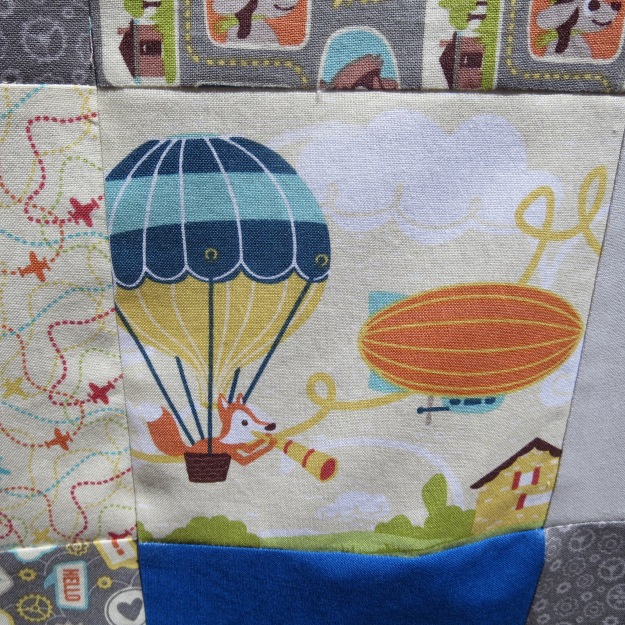
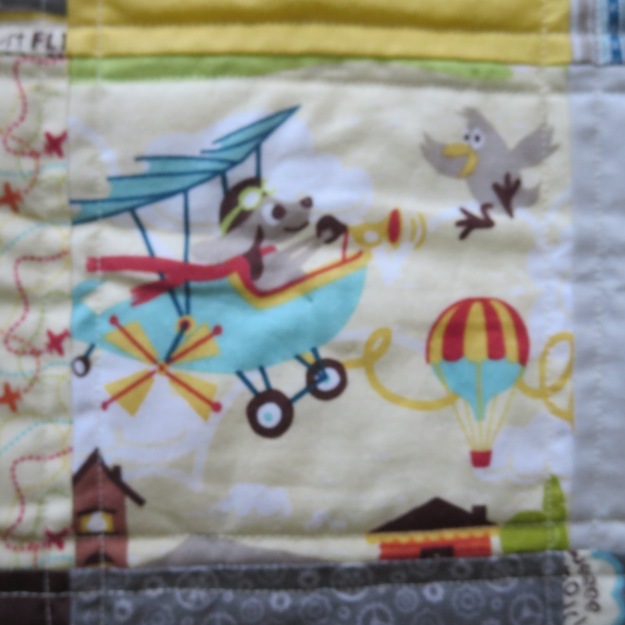
Some close ups of the main Little Flyers squares:

IMG_0212

IMG_0391

IMG_0392

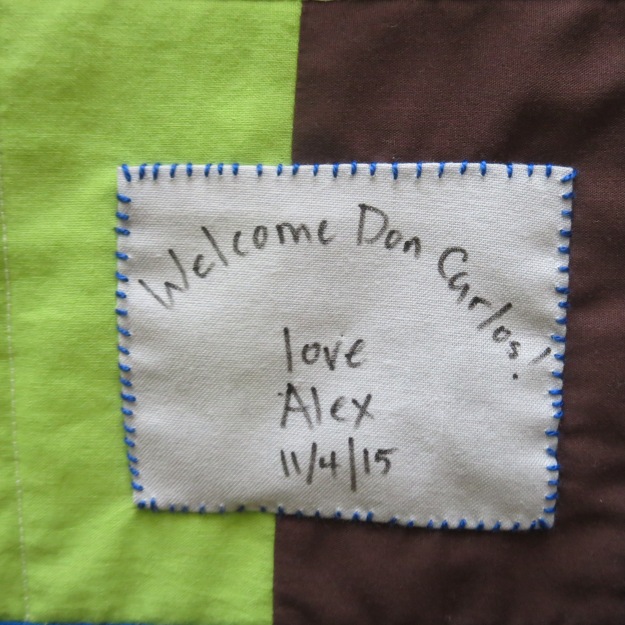
Darling, right?  For the quilting, as you can see, I did a simple ¼” (ish) straight stitch along each seam in a coordinating cream/yellow. I used Kona ‘Royal’ for a non-bias binding (didn’t have enough to bias) and made a simple label for her baby whose name had not yet been selected by his parents and thus I went with the name all their friends had been calling him during gestation, “Don Carlos.” So he can remember his roots, of course.

IMG_0396

In any event, Welcome Don Carlos! To Earth. He was finally born on 11/4/15 and I got to see him a few days later. He is cute as a button. Very fun to have him finally out here in the world with us.  Congrats to Ranta and Ross on your new family!

FIT Draping – Dress 4

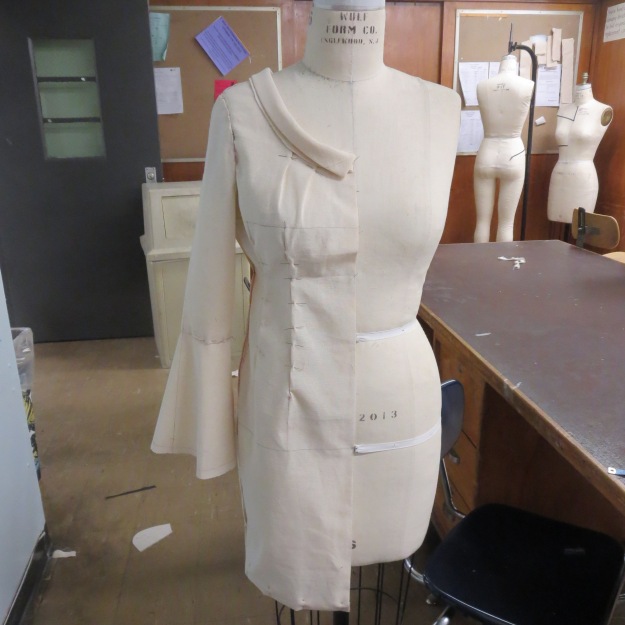
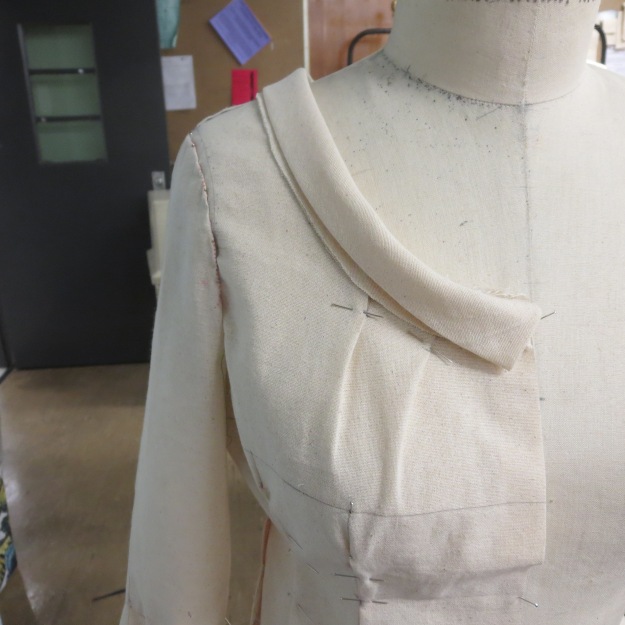
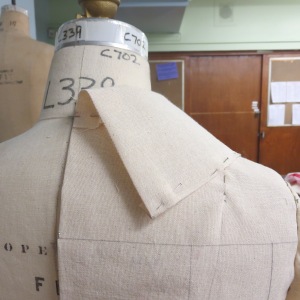
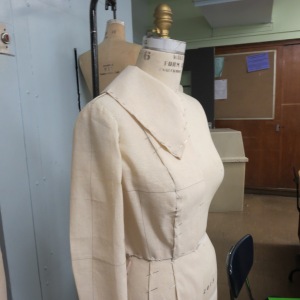
I’ve been remiss in posting.  Here are some shots of Dress 4 – the Shift/Sheath dress, with bias collar and puff sleeve (I made what’s called a trumpet sleeve – puff on bottom):

IMG_0383

With a lower neckline in front and back, I didn’t need a full on dart so I spread the extra fabric in front into two little dart tucks.  When this dress is pressed (which I did do before I turned it in), the dart tucks look really cute. A fun element to try later.  (Back neckline was low enough I didn’t need an above-shoulder line dart at all.)

IMG_0384

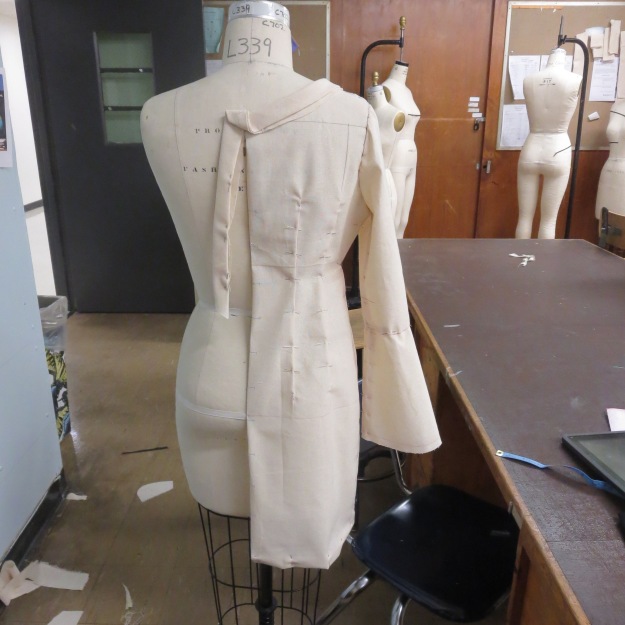
In the end, the collar would not end at CF but extend around across the left side of the dress (right side to you) to join the other tie end to create one piece.  It ends in the back with a knot tie that goes halfway down the back.  If I were making this again, I’d make the tie extend to about 6″ before the hem. This was lazyness – I cut too short and didn’t feel like fixing.  Too burnt out from dress 3.  🙂

IMG_0388

Above you can see the tie part of the collar.  She asked that our Sheath dresses be not too fitted – they should be comfortable. She liked this fit but for me, if I were making this FOR me, I’d likely make it a little closer fitting and use a stretch cotton but I tend to like things more fitted.  The hem length here is mid-thigh for a kind of mod mini-dress look.

IMG_0385

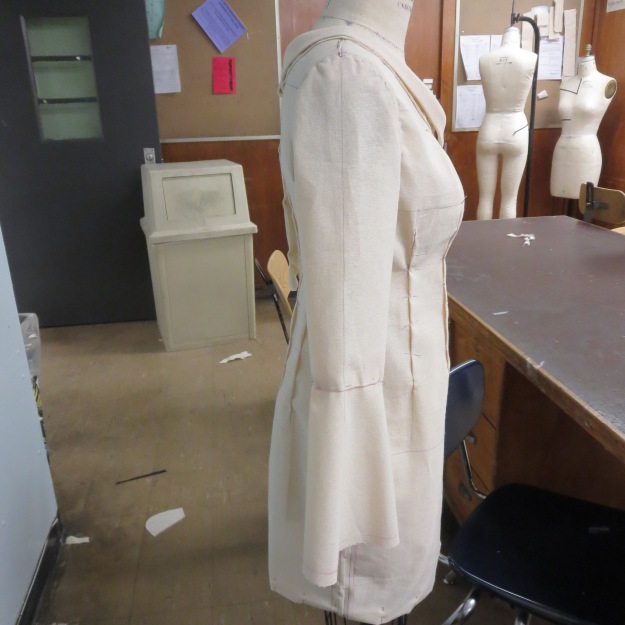
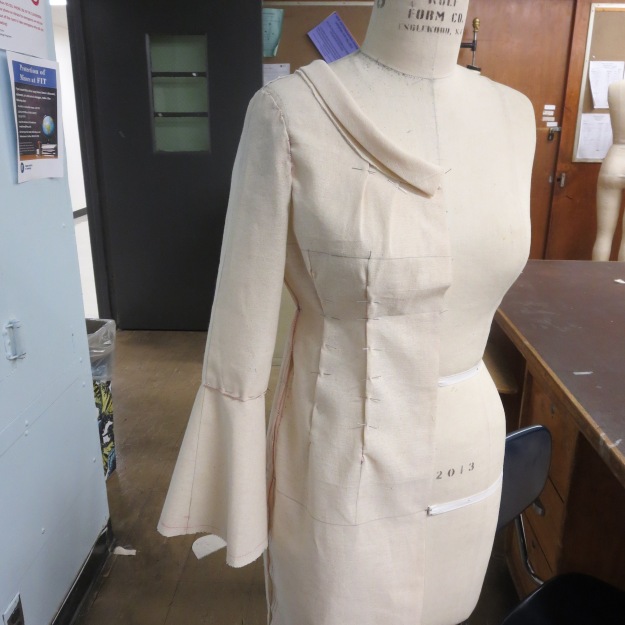
Sleeves are designed on paper and not draped – at least set in sleeves that we’ve done aren’t.  So sleeves feel very experimental to me – I followed instructions and this is what I got.  I’ll have to do a bunch more to really figure out how to translate my mind into the sleeve.  My real intention was a fitted to just below elbow more bell-like sleeve but instead I ended up with trumpet.  I actually like it the trumpet lot but if/when I make again, I’m going to do a bell sleeve as a draft and see how it looks.

IMG_0389

A more front view of the sleeve.

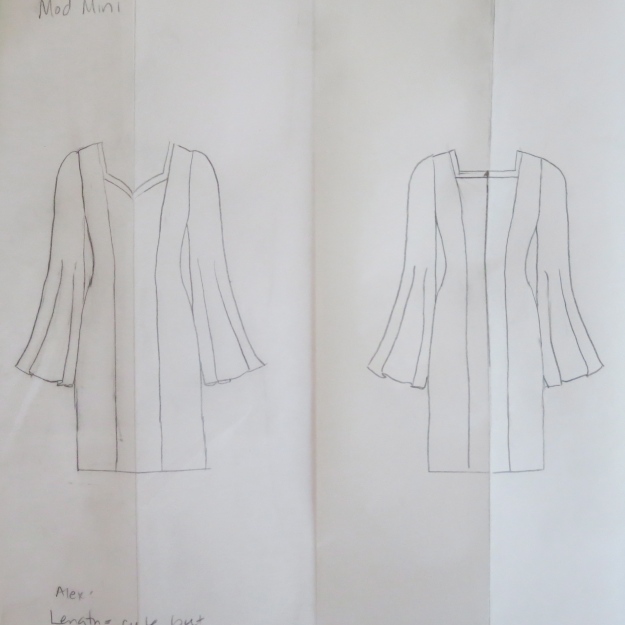
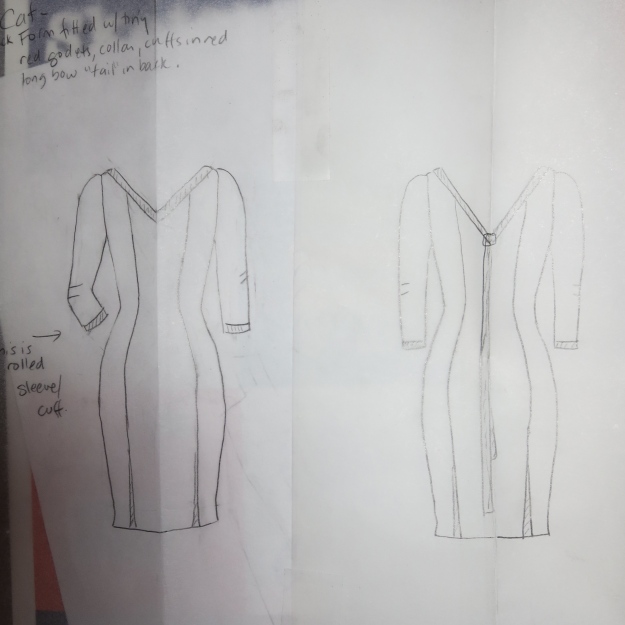
I modeled this dress on two drawings I submitted to be considered for my term garment project (coming up).  She rejected them as too ‘ready to wear’ but I thought the ideas worked well in the Sheath and thus, I went with it.  I ultimately got an A (as opposed to an A+) due to the simpleness but I like it which is kind of all that matters, so okay.

Mod-Mini Princess Line with 1″ collar.  You can see the sleeve is a bit different here.

IMG_0339

The back of another princess line showing the tie idea.  I like the length of my drawn tie better.

IMG_0354

Thanks for reading.  Dress 5 coming up, plus a QUILT!

FIT Draping I – Dress 3

IMG_0359

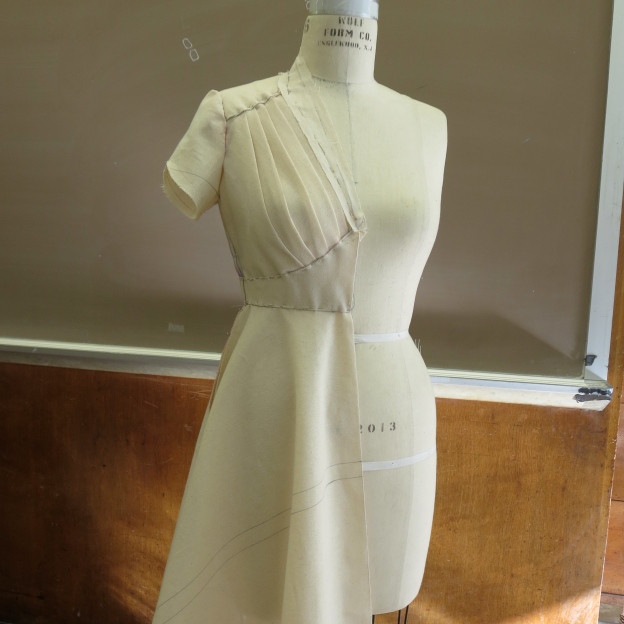
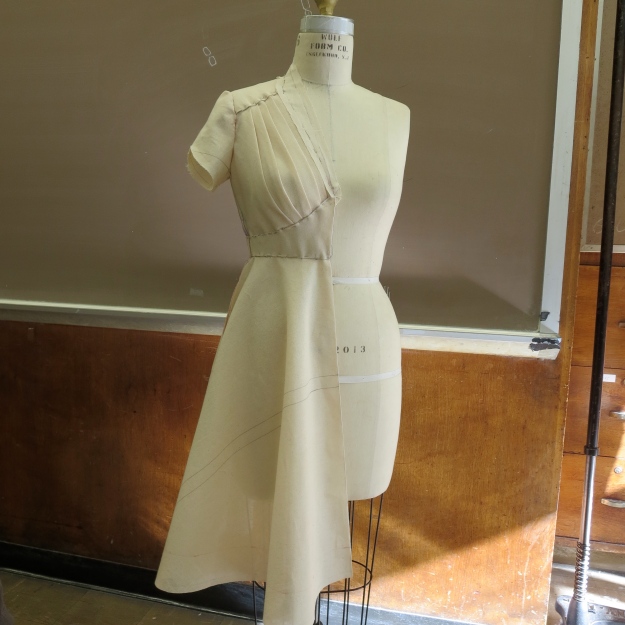
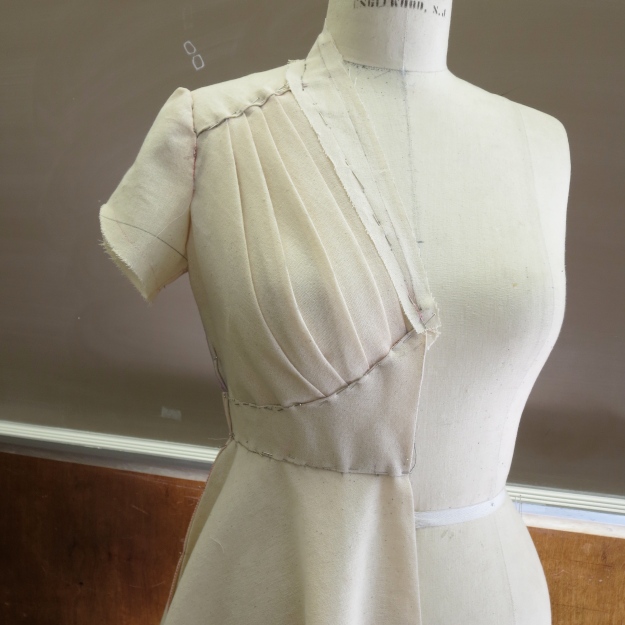
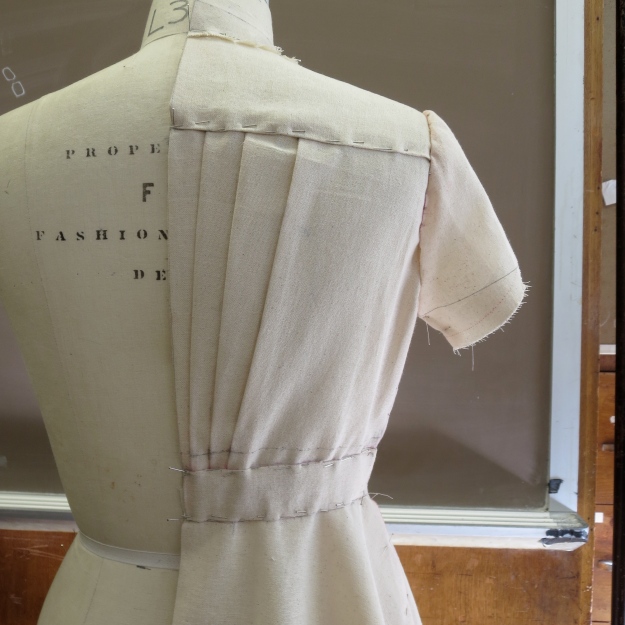
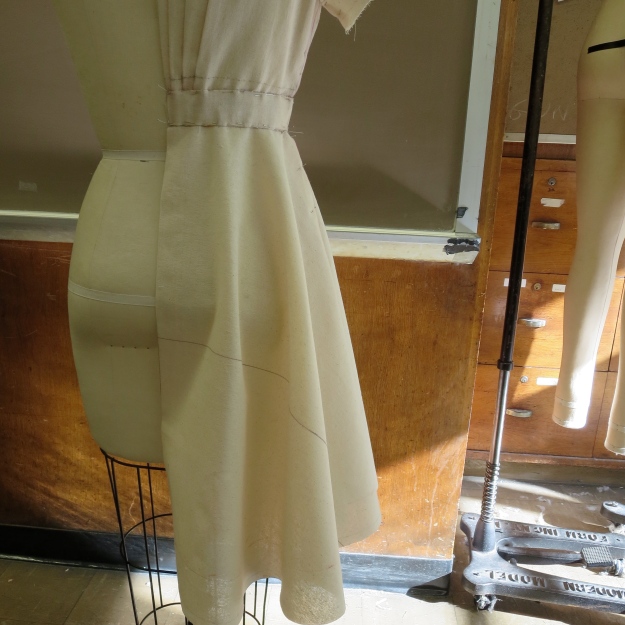
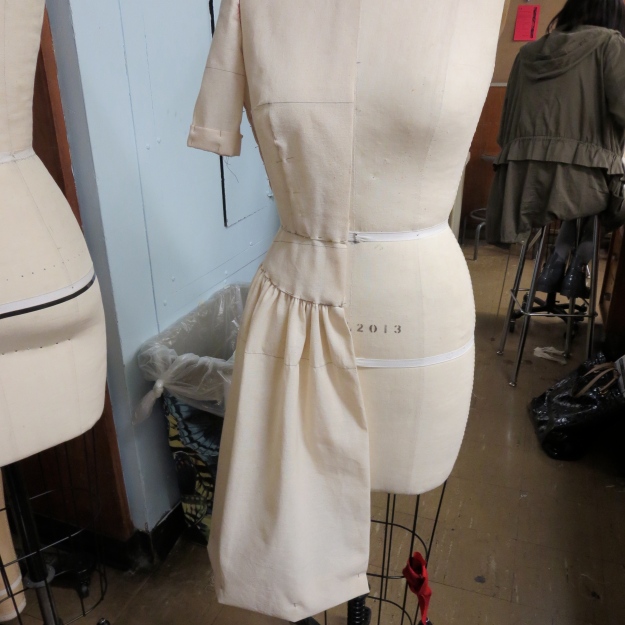
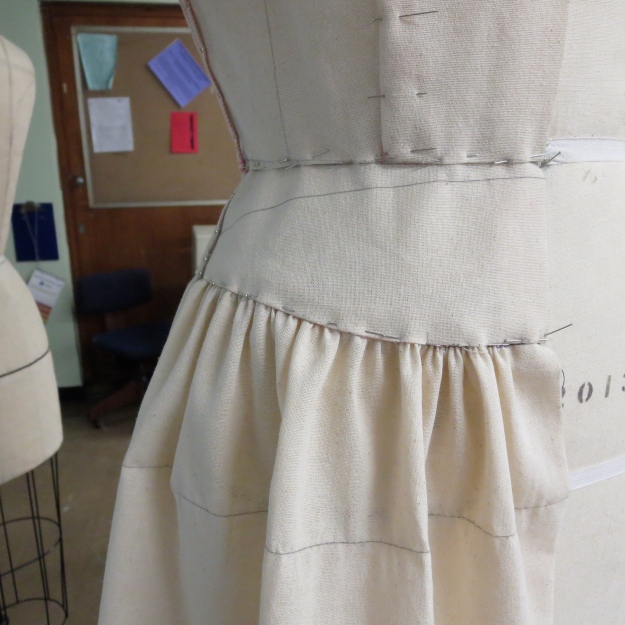
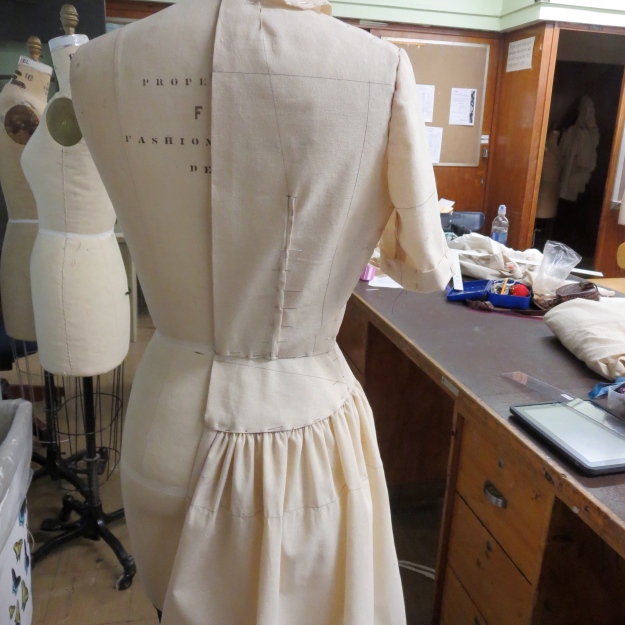
For this one, we had to design the neckline, shoulder yoke and midriff yoke, we had to use pleats or gathers in our design in both the front AND back bodice portion, design a cap sleeve and incorporate a flare skirt.  I’m really pleased with how this came out, but wow, this dress was a pain in the ass.

IMG_0360

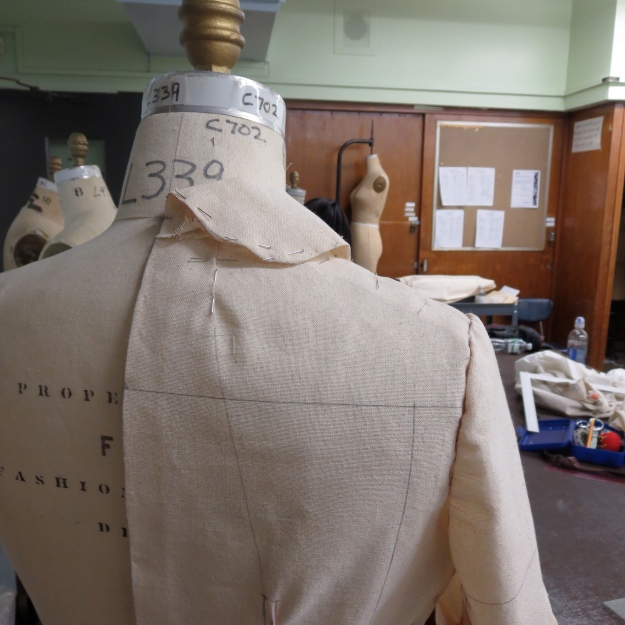
I got the idea for this design from a 40s style dress on the web so the genesis shape of front shoulder yoke and midriff yoke was styled from that.  The pleats on the web dress went straight across; I LOVE/prefer the way mine went, with the split around the ‘apex’.  The collar was not required for this project and is a little hard to discern from this photo due to the way it’s pinned on but it basically is a stand collar behind the neck curving around to flat against the sternum and fading to zero at the join with the midriff yoke.

IMG_0362You can see the back of collar here.  The back is entirely my own creation and in a perfect world I would not have pleats in it at all or something a little cleaner looking.  Still, I was pretty burnt out by the front at this point – It was tricky to get it to lay flat and not poof around the breast AND ugh, there just ended up to be myriad problems with this dress.

To wit – due to the ease in the back and yet the fitted front, I could NOT get the side seam to line up.   Hours lost there. I have no photos but there are probably 6 versions of a bodice side seam guidelines under the arm.  I finally pinned it by eye as it was the only way to make it balance.  Even with that, I still feel the fit in the is not optimal.  Yes, I want some room so you can move but it looks bunchy to me especially under the arm

I did the sleeve quickly and I’m not mad about the shape.  This was our first designed sleeve so I just made ‘something’ but in a future garment, I’d make either a short cap sleeve or do something non-cap that goes down the arm. But it fulfilled the assignment so bygones.

IMG_0363

Having an empire waist (my choice) made the hem a bit tricky and annoyingly, my flare skirt which looked fine when I draped it got wonked out when I pressed it. You can see it doesn’t quite hang right here.  Thankfully for grading (these photos were taken on a prior day), I took her advice and steamed (shrank) the fabric again and it suddenly hung beautifully.  Should have gotten a photo.  Total save.

I was pretty shocked I got an A+ on this one, mainly due to the side seam wonk.  But ultimately she loved the front as much as I did.  I think it’s really stellar.  I’m not sure this style would look good on me as I already have a large chest but I could definitely see taking the front of this design, redrafting the back a bit, and making a nice empire waist top for myself.  Also making a flare skirt to wear independently  I really got a lot out of this dress but wow, it was tough.  She said herself, that aside from the princess dress, this was our hardest assignment.  Other students made AMAZING things but some aren’t even done yet.  It’s that tricky.

Next up – a Shift Dress that we’re turning into a Sheath dress.  I’m doing the Shift this weekend, I’ll try to remember to take pre-sheath photos.  This dress will end up with a bias collar (which she demoed last night and was hella cool) and a puffed sleeve – mine is a long bell sleeve.  Can’t wait.

Draping at FIT: Dress 2

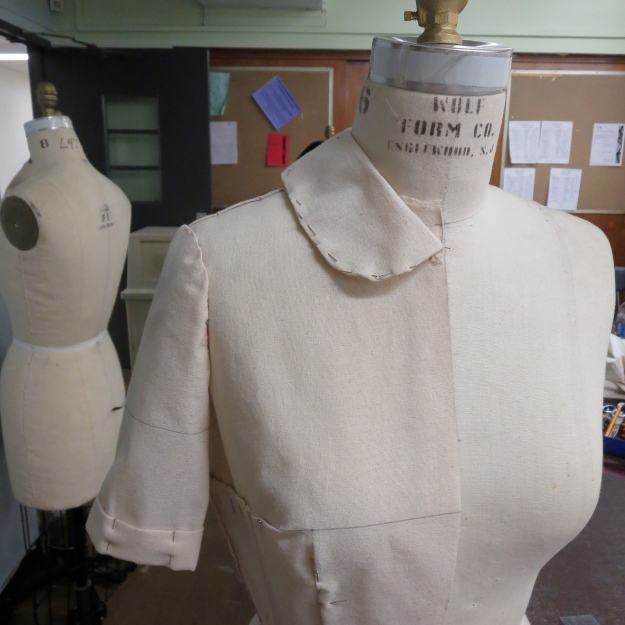
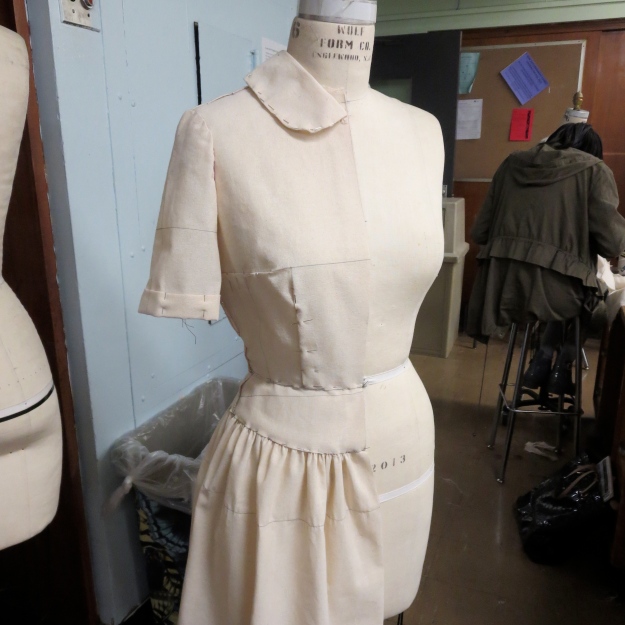
For this one, we did another traditional bodice, this time with a bust dart instead of shoulder dart and, on the back, a neckline dart instead of a shoulder dart.  We made a non-roll collar (although honestly it seems almost the same), used a hip yoke, made facings for each of those as well as neckline facings and draped a gathered dirndl skirt.  (Collar below was the revised collar – I thought it suited the dress better.)

IMG_0309 IMG_0310
IMG_0306
IMG_0312 IMG_0313 IMG_0315

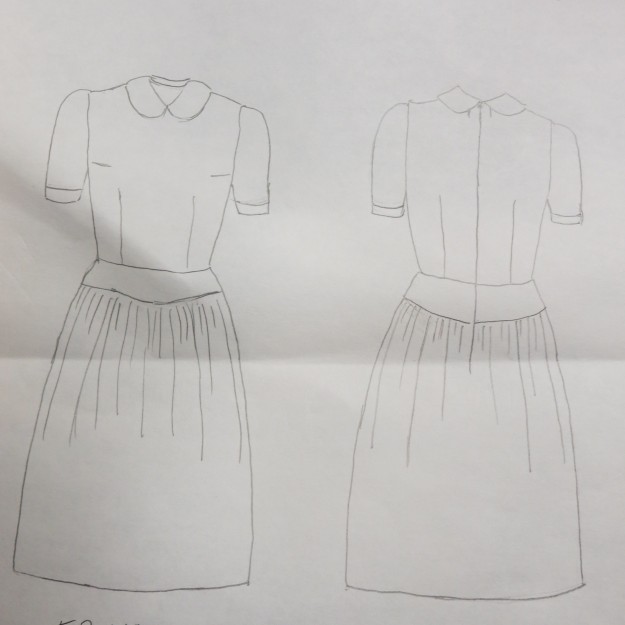
Line drawing:

IMG_0317

I had planned to blog this class more but wow, it is a total time and energy suck.  Not complaining but on top of my full time job and the 6 hours of class, I’m spending at least 10 hours (often closer to 18) each week on draping so by the time I get home, I’m pretty much good for nada.   I am learning a ton, though, which is cool.  But wow, so tiring.

More soon.  Onto dress 3!  Yikes – have to figure that out!

FIT Draping – Dress 1 complete

I’m pretty happy with it, mostly with the fit.  The color is me-designed and is pretty boring but at 12:30a last night I was in love with it.  So I may go down to school on Saturday and drape a new, less-nun-like collar.  But this one does the job enough.  Love the way the skirt fits.

IMG_0270

Collar close up.  Wow, it looks really big. I may make this smaller:

IMG_0275

Back of collar:

IMG_0272

Side-ish view:

IMG_0274

I fixed the front fit issues by taking in the side seam at the waist, grading to the line I was at at the under arm side seam.  It fits much better now.  I also adjusted the sleeve pins after I looked at the textbook and realized mine were incorrect.  Pinning seems to be very important to these teachers and thus… it was worth fixing.

At this point though, I’m not completely done.  I hadn’t realized that we were required to produce a technical drawing (I think, as opposed to a fashion illustration) and the swatch we’d make it in so I’m back to FIT today, this time to the library to get a book on how to do that.  My dreams of a light weekend are dashed – I’ll be working on drawing this thing.  But it’s exciting to see how much we’ve learned in only 4 classes.  Next week we start draping dress #2.  Onward.

FIT Draping I – classes 1-3

It feels like a year since I’ve updated much less read my blog feed. On August 31, I started back at FIT, this semester taking Draping I. For those of you who don’t know me, I am a professional musician part time and a paralegal the rest of the time and my sewing skills generally run to quilts. But I’ve hated how all my hand sewn clothing turned out. Plus I have never loved my performance clothing. Plus I’ve never liked my personal clothing. And my body isn’t an actual perfect size anything. And wouldn’t it be nice to have clothing of my own choosing that fit?

Enter FIT. You can take up to 24 credits there as a non-student so over the summer I took Sewing I and learned a ton. This semester is Draping and it is probably the most time intense class I’ve ever taken in my life. I am putting in hours per class per week. So far we have had 3 three-hour class sessions and I have spent at least 30 hours on homework. I’m tired.

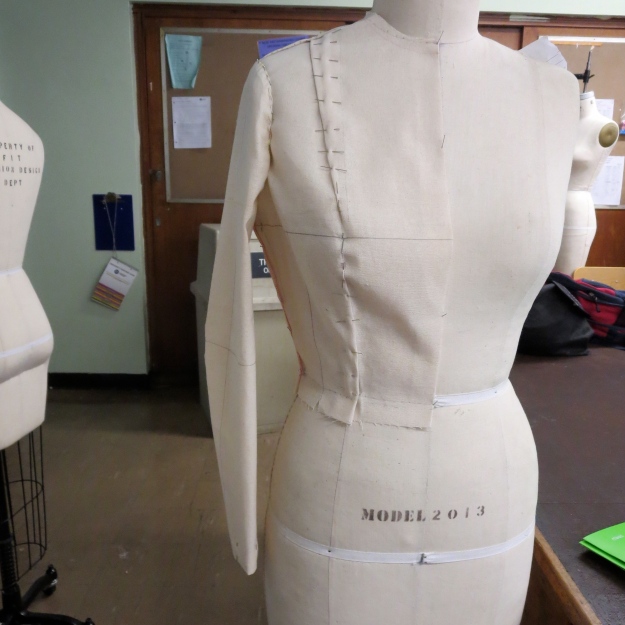
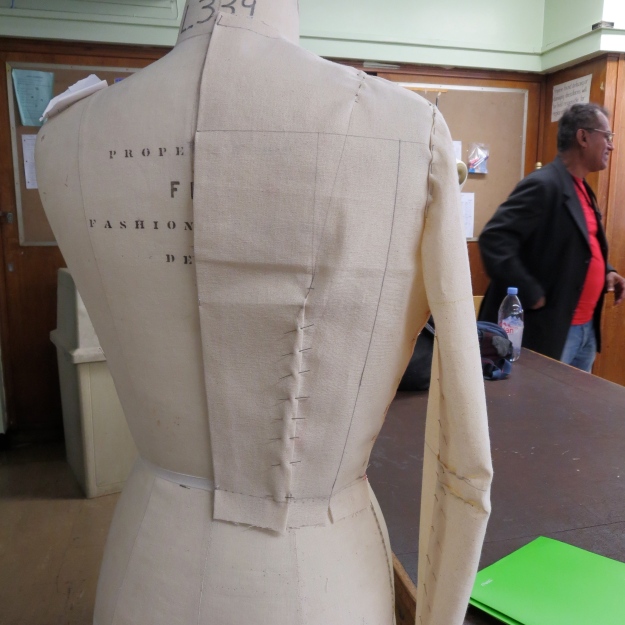
I spent 7 hours yesterday and 2.5 today down at the school (thank you, state college that cancels class for religious holidays!) and caught up with the classwork up to this point. Bodice sloper front, bodice sloper back and set in sleeve (which shape we did not drape; rather used an industry pattern piece for our dress forms which we then had to set in).

Voila:
IMG_0260

IMG_0261

So there are a few fit issues.  I need to re-pin the front as it’s not hanging straight but I think it actually DOES (just repined to form badly).  One of the darts is pinned in the wrong direction.  There may be too much ease (or not enough) in the back.  Still, overall I’m very pleased with how this came out.  I had to make 12 fronts over the past 3 weeks to get this one front mostly right.  While I’ve gotten faster, each front is taking at least 75 minutes to do so you do the math.  The guy in the back is a very nice sewing teacher ‘assistant’ who passed by – he teaches a couple of the draping students in sewing class and stopped to say hi to them and then hung out giving us pointers, pointing out errors, etc.  Seriously, this would have taken another 6 hours and would not have looked so good.

Our professor says at some point in the semester this will all just ‘click in’.  We’ll ‘get draping’ and it will become fun.  At this point, I’m still not great at analyzing fit issues and adding sewing ease (the bane of my existence) but I’m sure that it’s in me to learn this skill.  For now, though, I’m at home and it’s still light outside.  I have been feeling like a vampire, getting home so late each night.  I’m off to watch TV or read a book or do anything that doesn’t involve draping.  Tomorrow, we drape a pencil skirt and rolled collar for this (the collar we have to create a ‘design element’ for – I have no idea what I want to do so I am estimating living at FIT this weekend) and polish it up for grading next Monday.   Then we are onto the next drape.  All told we will drape 5 different types of sample dresses like above and then we finish the semester with a princess seam-based self-designed dress.  If nothing else, I’ll be trying many things I’ve never done before in this class so that’s cool.  For now, I’m officially taking the night off!

If you celebrate High Holidays, Shana Tova.  Be well, friends.

Summer Recipe(s)!

With my sewing machine back in the shop for two weeks (this time at Sew Right in Bayside, Queens), I’ve been doing other things to occupy myself including a lot of cooking.  I made one of my favorite recipes yesterday, and it’s great and easy for summer so I thought I’d share it.  I don’t tolerate onions or garlic very well,, so I’ve posted both my modified easier-for-me-to-digest IBS version and the original so you can bake this up to suit your body and taste.

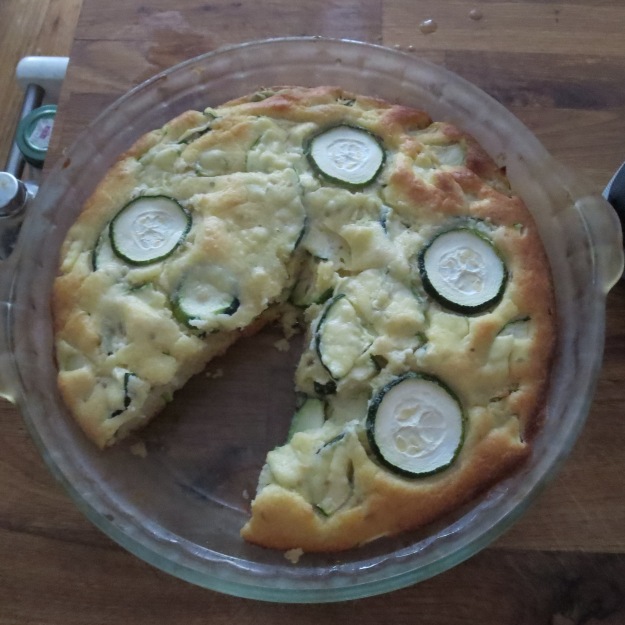
Grandmother’s Zucchini “Like a Quiche”

IMG_0243It smelled so good I forgot to take a photo before I ate some!

Ingredient list for more easily digestible version:

4 eggs, slightly beaten
1 c. bisquick*
½ c. garlic inflused canola oil**
¾ c. grated parmesan cheese
Generous ½ t oregano
½ t salt
3 c. zucchini (1 huge or 3 small)

Preheat oven to 350F. Combine all ingredients other than zucchini in a bowl. To prepare zucchini, I tend to slice 1/8” wide rounds which I then quarter. (If you want to get fancy, reserve 6 rounds (don’t quarter) to decorate at end.) Combine quartered zucchini with other ingredients and then turn mixture into a non-greased 9” deep dish pie plate. If you reserved your ‘fancy rounds’, now press them into the top evenly spaced. This will give your final baked version a more polished appearance. Cook for 25-45 minutes in a preheated 350F oven. It’s done when it looks slightly browned and when you press in center, it feels baked/not squishy-wet.  Let sit for a few minutes after taking out to finish baking and then serve. Keeps well and also tastes great cold.

Notes:

* If you have IBS and are eating low FODMAP, use gluten free Bisquick instead.

** You can usually find garlic infused olive oil in the supermarket. If that’s all you can find, use ¼ c. of that, plus ¼ c. of plain canola. Or you can make your own garlic infused oil as follows:

Garlic-Infused Oil

Place your chosen oil (for this recipe, canola) and a peeled, quartered clove of garlic (keep it in larger chunks; you’ll be removing this later) in a saucepan and heat on stove at medium heat until you start to really smell the garlic (3-5 minutes). Remove from heat, cover and let steep for an hour. Remove garlic and you are ready to use your garlic infused oil.

**

For those of you who’d like to try the original, the directions are the same but swap out the ingredient list for my grandmother’s (Note: I think the garlic infused oil version actually tastes better so you might want to still infuse oil, add onions and just adjust the cheese for your more onion-y version).

4 eggs, slightly beaten
1 c. bisquick
½ c. canola oil
½ c. grated parmesan cheese
½ t oregano
½ t salt
½ c. onion, chopped
1 clove of garlic, smashed
3 c. zucchini (1 huge or 3 small)

**
Regardless of what you make, enjoy! This is one of my all time summer favorites. A great way to enjoy the end of a delicious summer!
Sewing Machine TRAUMA.

My Brother NX450 was acting up the past month so I took it in for repair about 2 weeks ago to a new shop to me, Gizmo Notion.  I was encouraged by the incredibly nice shop owner/repair man.   He seemed great – I had such faith!

Ultimately, the machine is still not sewing well and in a couple ways is worse.  I took it to him because it was skipping stitches despite needle changes, race cleaning, etc.  Also the automatic needle threader had died several months ago and while I can live without it, it makes my life easier to have it fixed so….  When I picked the machine up, it seemed better (but he stated the threader could not be repaired at all) but I still was unsure if it was skipping stitches (it wasn’t).  HOWEVER, he put so much oil in the machine that now, a week later, I am still getting oil out of it.  Luckily it has damaged only one thing – which was a sample so who cares – but it has made me anxious about sewing a great deal with it.

Well, ‘not sewing’ is not a problem because it just will not sew this quilt sandwich.  It seemed clean enough and I’m on a deadline so I thought I’d take the risk.  I’ve tried adjusting the presser foot pressure, changed the needle… It just will not advance the sandwich consistently.  So I have about an inch of good and then an inch of tiny stitches – it just looks SO BAD.  And it’s hella hard to rip out.  Also the thread cutter suddenly won’t cut the bobbin thread.  What is going on?

Upshot:  2 weeks after taking it into service, it is no longer skipping stitches but it is now leaking oil, won’t cut thread and won’t advance the feed dogs properly.  It seems to do with the weight of the quilt (which is not large).  My sample sandwich of oil-stain fame will advance no problem.  But the actual quilt?  Nada.  I have made quilts on this machine before of similar size with absolutely no problems so this is an anomaly.  A very frustrating, ill-timed anomaly.

So I’m not sure what to do.  I can go back to him and demand he fix it but since oiling it seems to be his method of fixing, I’m just not feeling like he knows what he’s doing on this Brother machine.  That said, there are almost NO options for sewing machine repair here in NYC.  He is the closest to me and I don’t have a car.  It looks like my other options are both WAY out in Queens (involving multiple trains and a bus).  Do any of you NYers know of a repair place that you like?  Reviews for the garment district are horrible.  I am so sad – this quilt is a gift that was supposed to be delivered on Sunday and that’s just not going to happen. Also I go back to FIT classes in 2 weeks and I am a bit freaked out that my home machine is so wonky.

Thoughts? Advice?  Someone please save me. I’m at my wits end!

Thank you in advance for any help!

Update:  I swapped needles again, rethreaded everything and it seems a bit better.  But I’m doing this all the time.  So please lay those tips and repair info on me.  I can really use the help. Thanks!

Further Update: Nope. It is skipping stitches again and now the tension looks wonky. Stopping. Likely heading out to Bayside, Queens tomorrow. Good times.

MMM Quilt Front is done!

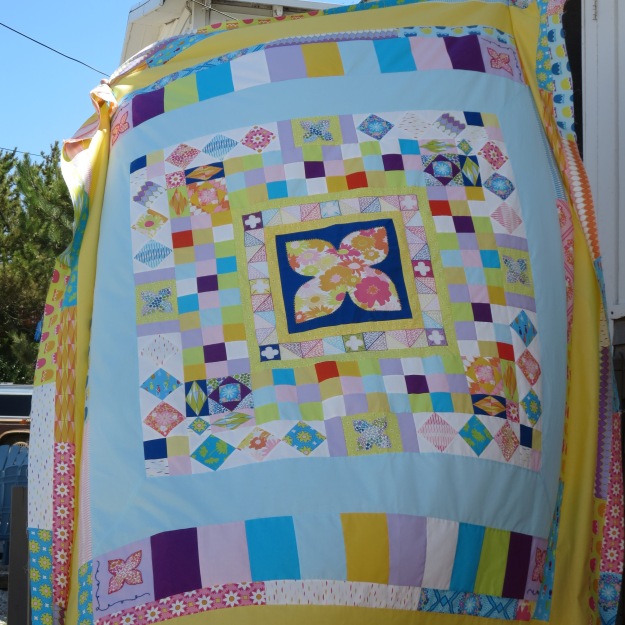
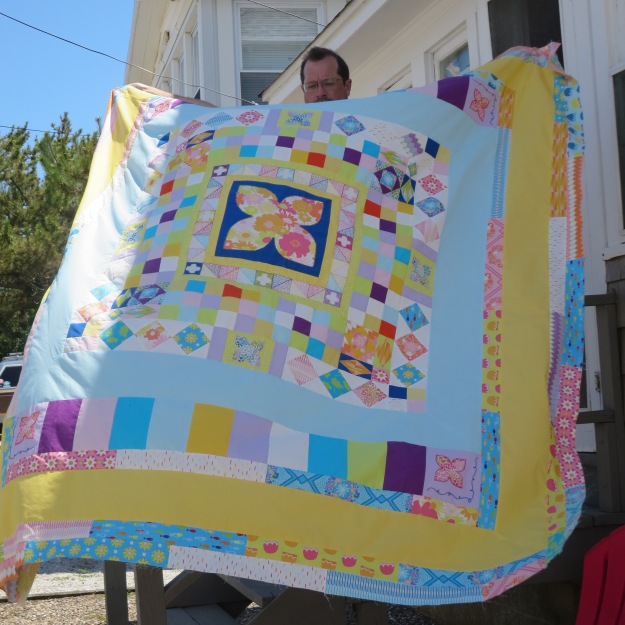
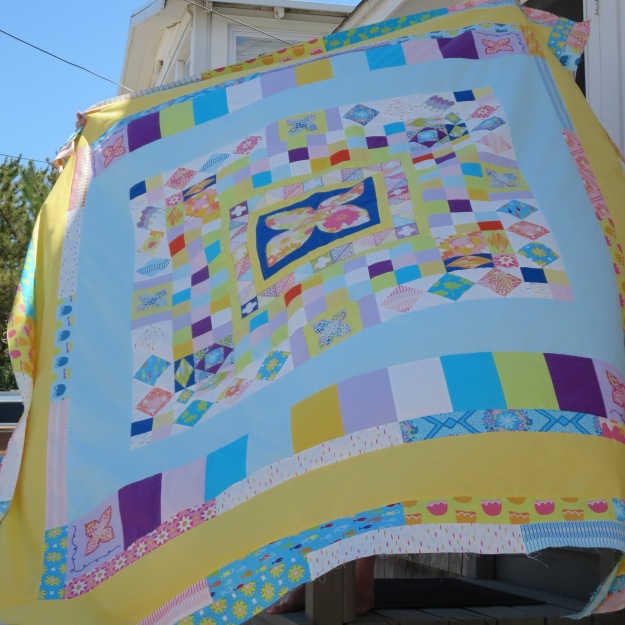
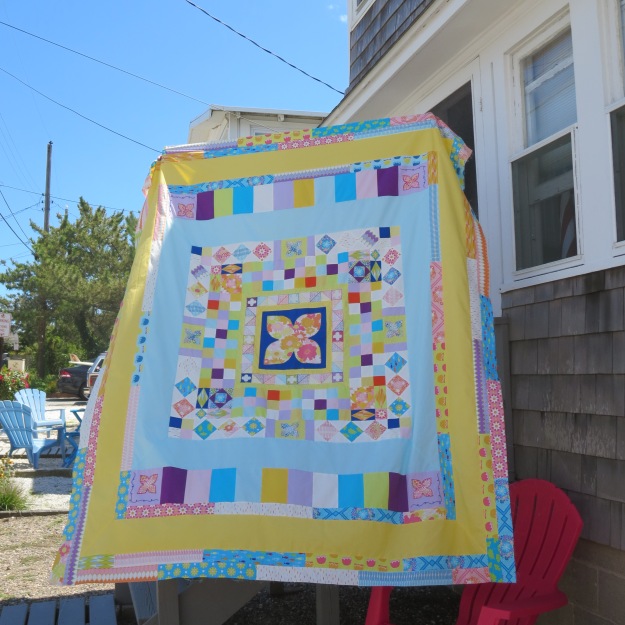
We were ‘down the shore’ last week for a blissful week off.  Or mostly off.  I did some sewing in addition to kayaking, swimming, jumping lots of waves, biking, reading and snoozing – of a secret project to be shown later – but for now, being there meant we finally had the room to show off the finished Modified Modern Medallion quilt-top I finished last week.  Behold:

IMG_0223 IMG_0216 IMG_0214IMG_0217It is of course *windy* down the shore but I think you get the idea.  The center (up to and including the blue) is Rachel’s design from her excellent Handstitched class.  Her quilt ended up being a true 60″ square Medallion.  I wanted mine to fit my bed so I added 6″ each to the top and bottom to mimic the shape of a double bed (the multi-colored ‘teeth’ section with loopy embroidered edges) and then added some extra rounds of scraps and an additional plain quilting (the yellow) round to bring it to my final chosen size of 75″X87″.  I’m very pleased with this extremely ‘happy’ quilt.  Can’t wait to quilt it!

MMM Back – Going Scrappy!

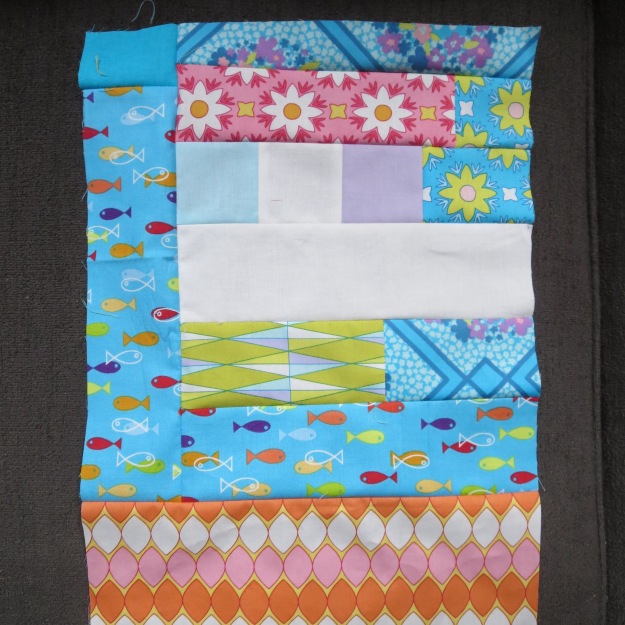
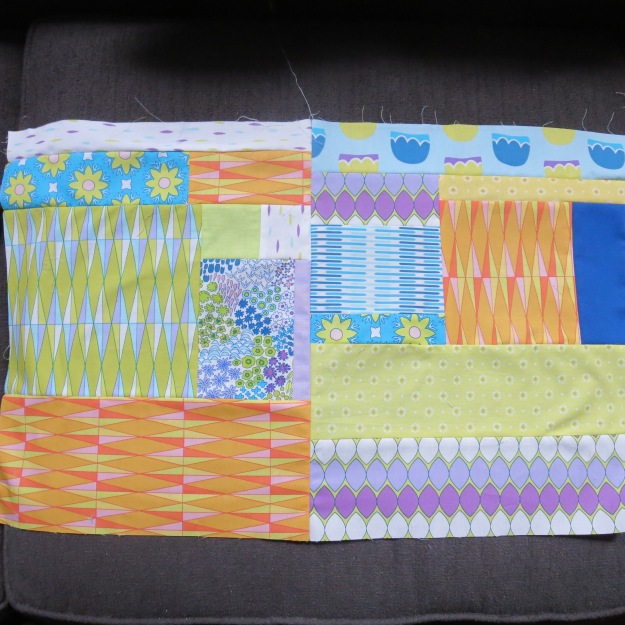
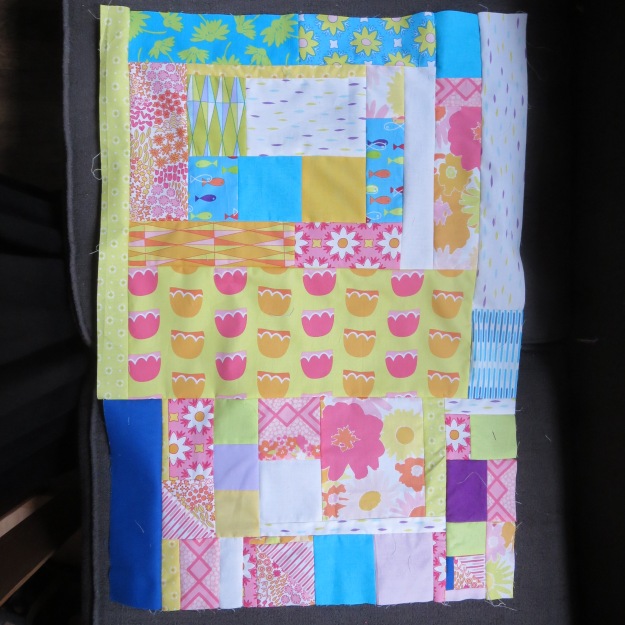
I’ve started creating the back for the Modified Modern Medallion (MMM) quilt.  I originally thought I’d do the ‘big sheets of fabric’ thing just to get it done, but with the amount of scraps I have and the size of the ‘Nook overall (plus I LOVE these fabrics) I decided that at least part of the back would be composed of scraps. Here’s some of what I have so far:

IMG_0195IMG_0200

IMG_0197Obviously, this takes a lot longer to do.  But I’m hopeful, if the Airflute cooperates, that I can get some of this done next week while we are ‘down the shore’ and still be on target to have this sucker basted before I start back at FIT at the end of August.

I’m having some issues with my home machine, Brother N450.  I’ve cleaned the race several times, changed the needles, changed the bobbin and the thread and still, if I don’t rethread it ever hour or so, it is skipping stitches.  It feels weird when I thread it so I suspect there is something going on ‘behind the scenes’ where I cannot see it.  I’ll need to get it fixed pre-FIT so I’m just trying to limp it along until I go on vacay and then I’ll haul it out (literally, no car here in NYC) to Queens when I get back.  It is what it is.

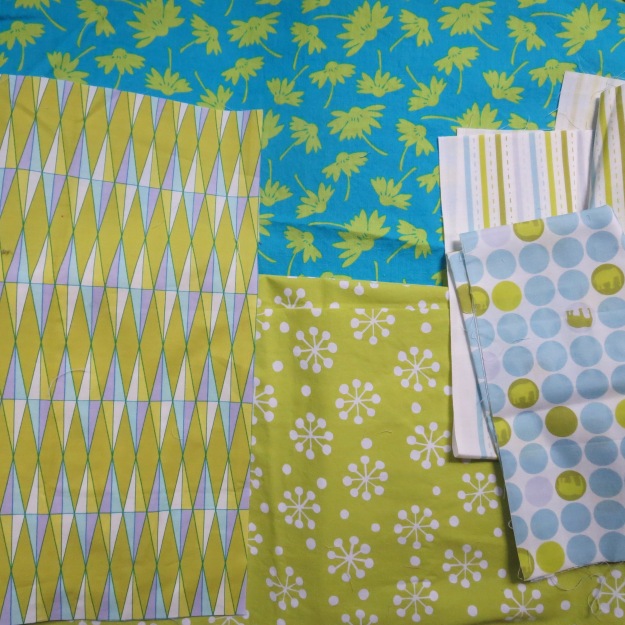
I will run short of scraps for the back but I found some stashed other-beloved fabric that will hopefully blend in enough. The fabrics that are left on the screen are used in the quilt already.  The other three are the reinforcements.  Those coupled with some leftover solids should make it work.  Fingers crossed.

IMG_0194